Setup Tanzu Kubernetes Grid (TKG) on vSphere 6.7u3
To setup Tanzu Kubernetes Grid on vSphere 6.7u3, download the files from VMWare Downloads
Prerequisites
- Ensure there is a network available in vCenter that has DHCP enabled
- The network used to deploy TKG is routable
- DNS server thats presented by DHCP server can resolve the vCenter FQDN. If not, during configuration use the IP Address of vCenter and not FQDN
- HA cluster with DRS enabled
- Multi-host cluster
- Docker is available on the machine that is going to be used to deploy TKG control plane
- Internet connectivity to docker hub
Let’s Begin
Deploy the control plane (Management Cluster) using UI
-
Download the
tkgcli and put it in thePATH -
Upload the
photon-3-kube-v1.18.2-vmware.1.ovainto vCenter and after upload is complete, select the vm, and convert it into a template. -
Upload the
photon-3-haproxy-v1.2.4-vmware.1.ovainto vCenter and after upload is complete, select the vm, and convert it into a template. -
Generate a SSH keypair
ssh-keygen -b 2048 -f tkg -q -N "". This will generate 2 files in your current directorytkgandtkg.pub -
Execute
tkg init --uifrom the command line. This will open up a tab in your default browser.
-
Let’s select
DEPLOY TO VSPHERE
-
Now provide the IaaS configuration. NOTE its preferred you provide the IP Address of vCenter here, as you might run into issues while provisioning the workload load clusters. If the DNS doesn’t resolve, the workload clusters will end up with a status
createStalled. -
Once you’ve filled in the vCenter details, click on connect, to specify the Datacenter and the SSH Public Key. For the public key,
cat tkg.puband place the contents in the UI, and click Next
-
Here select the Instance Type you wish to create your control plane with. I will choose Development and
mediumtype. Name the Management Clustertkg, and select the API SERVER LOAD BALANCER template that was uploaded earlier. Click Next
-
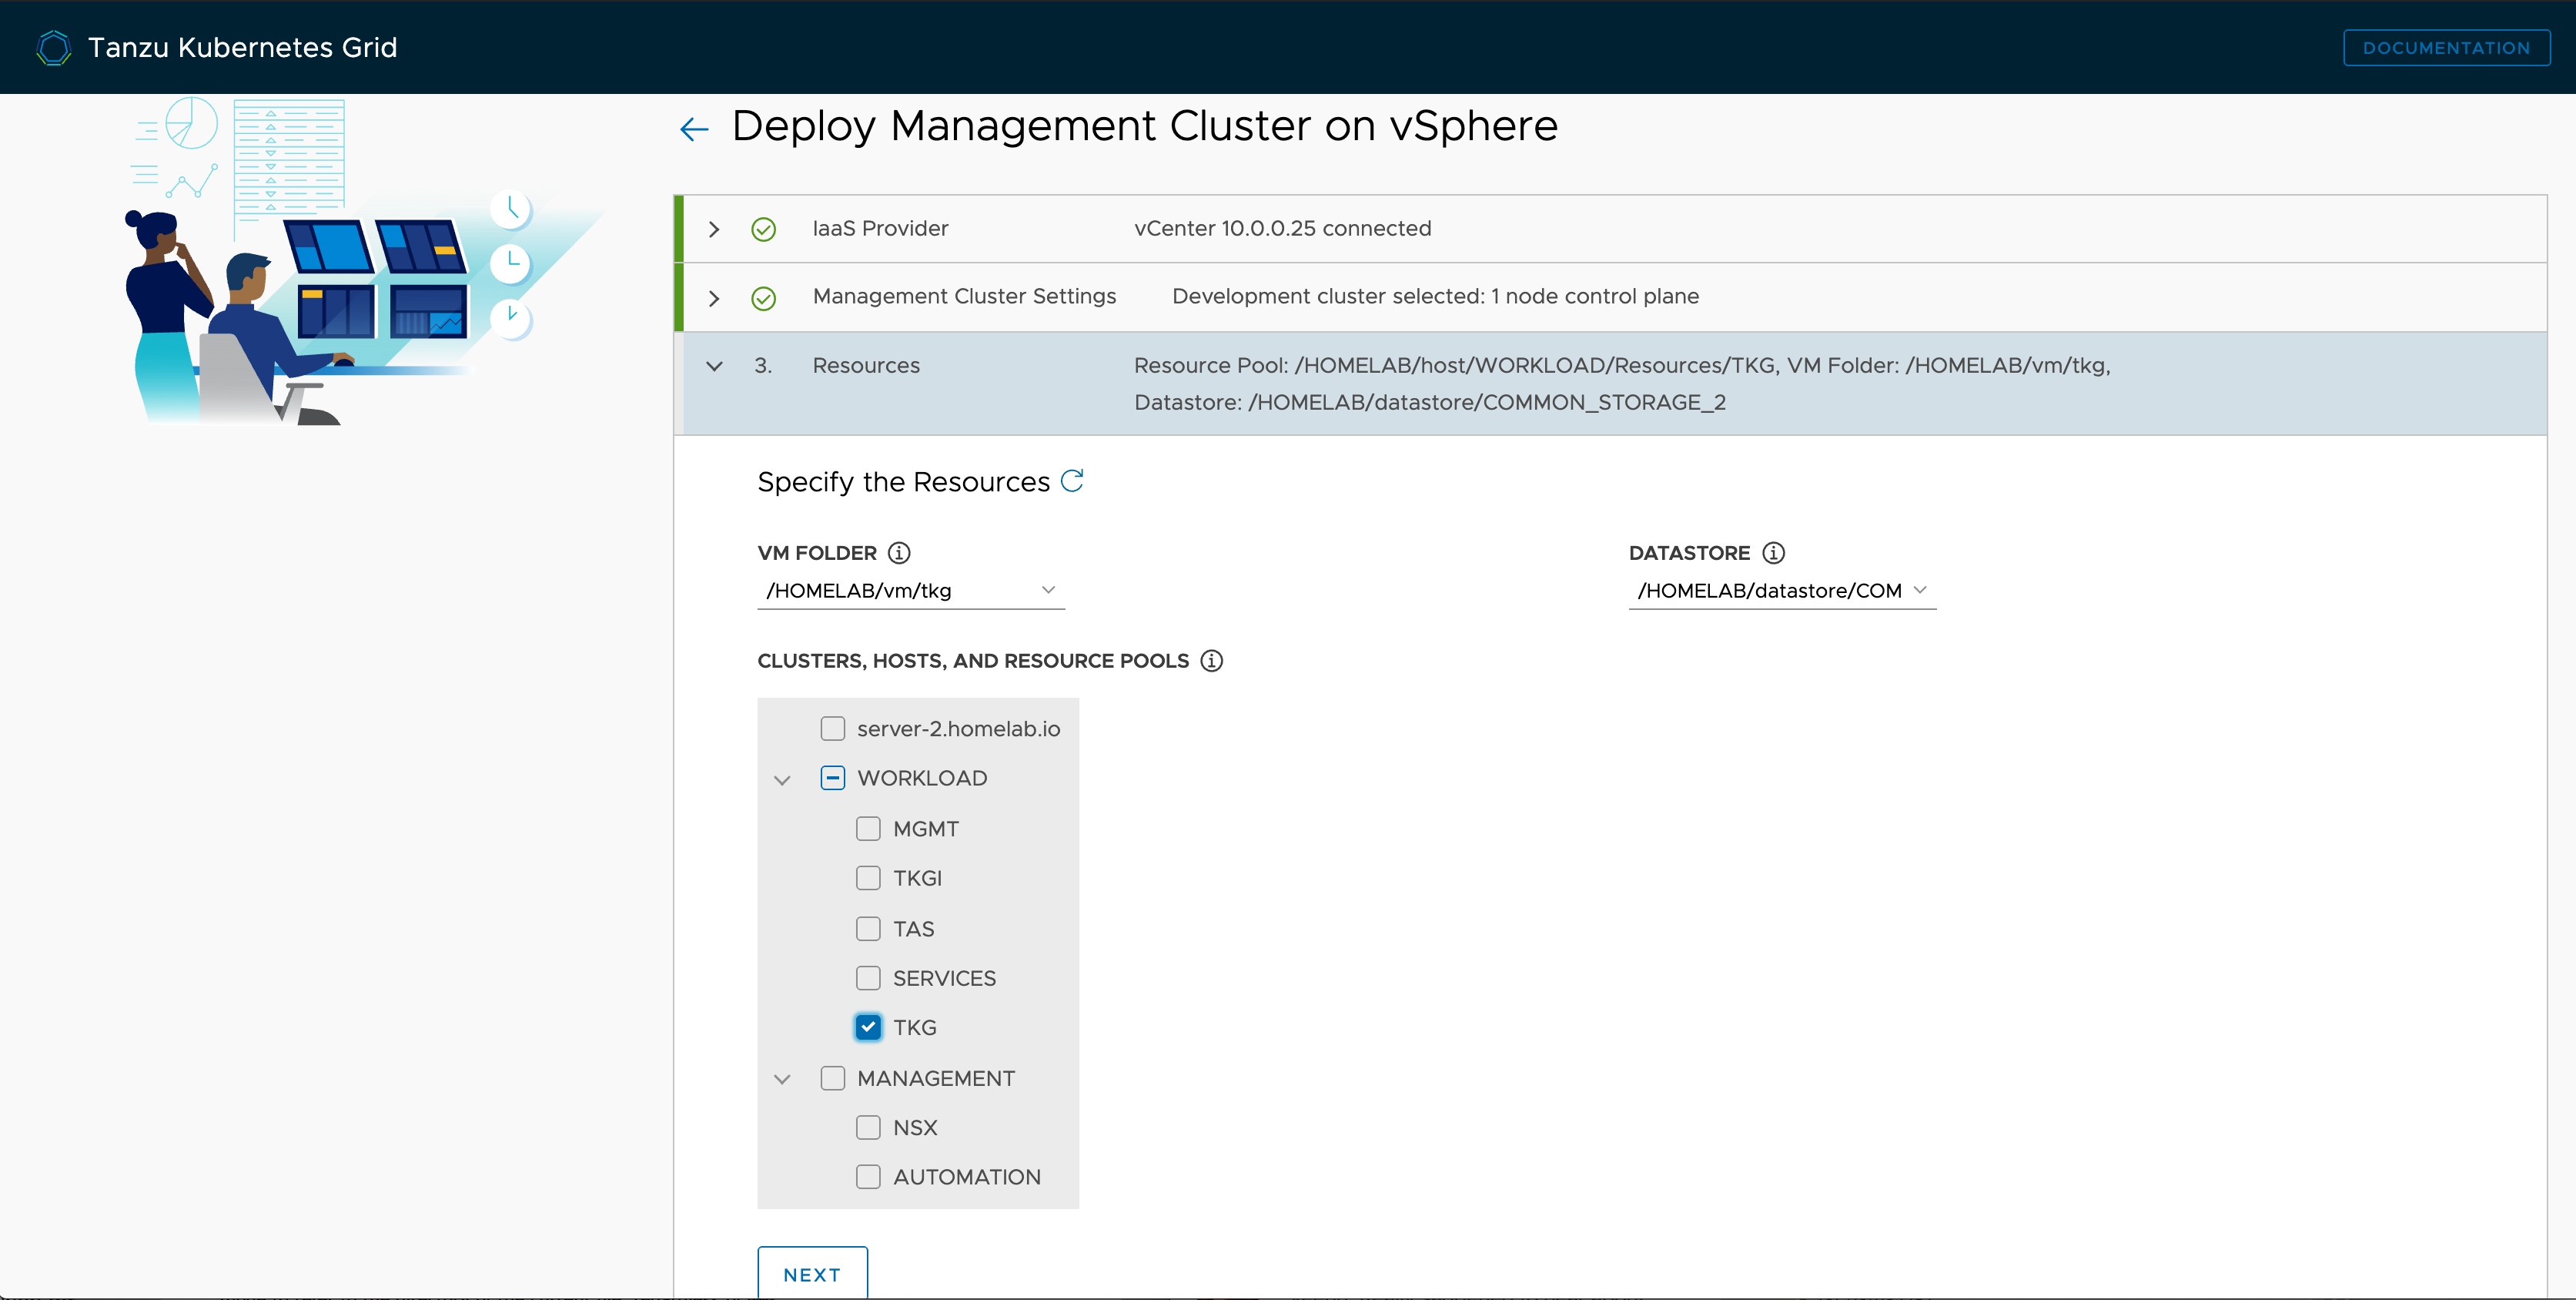
Under Resources Tab, select the VM Folder, Datastore and the cluster or resource pool, you want to use for deploying the management cluster, and click Next
-
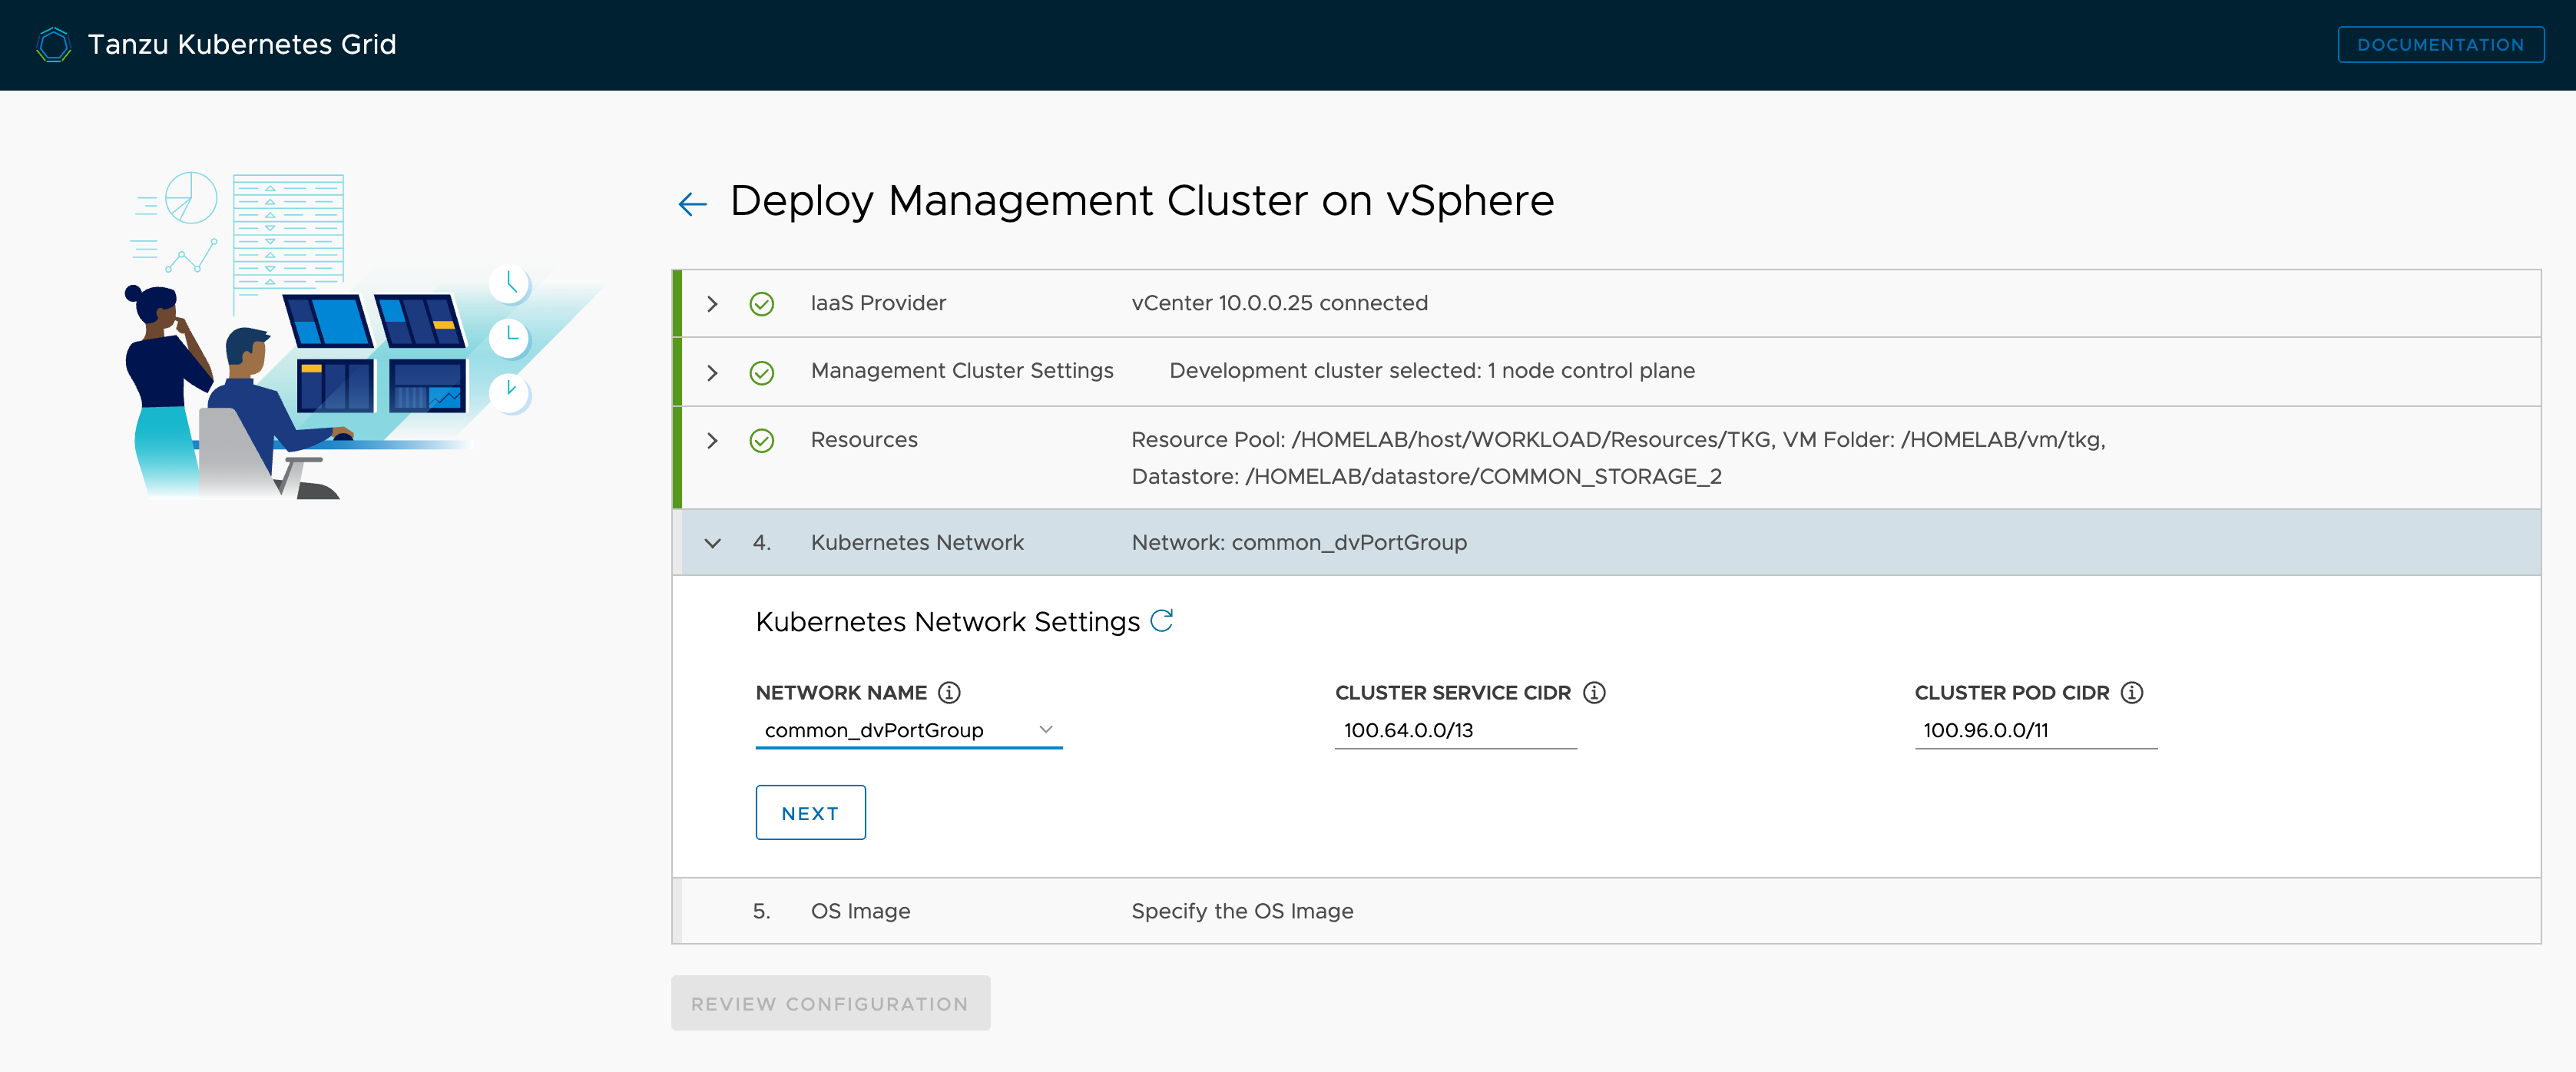
Under Kubernetes Network Settings, select the routable network that has DHCP enabled for the Network Name. The Cluster Service CIDR and Cluster Pod CIDR can be left to defaults unless you need to change due to overlapping networks. Click Next
-
Specify the Kubernetes OS Image that was uploaded earlier, and click Next

-
Let’s review the configuration, and the click on
DEPLOY MANAGEMENT CLUSTER
-
Once you click on the deployment, a
kindcluster is created on the local docker, which can be verified by opening up a new terminal and queryingdocker ps
-
This process of creating the management cluster would take a few minutes to spin up the vms on vSphere.

Deploying workload cluster
- Once the management cluster is built out, the next step would be to deploy the workload cluster.
To do this execute:
> tkg get mc
 MANAGEMENT-CLUSTER-NAME  CONTEXT-NAME
 tkg *                    tkg-admin@tkg
> kubectl config get-contexts
CURRENT   NAME            CLUSTER   AUTHINFO    NAMESPACE
          tkg-admin@tkg   tkg       tkg-admin
> kubectl config use-context tkg-admin@tkg
Switched to context "tkg-admin@tkg".
> tkg create cluster ks81 -p dev -w 3
Logs of the command execution can also be found at: /var/folders/fj/c15y_t9x21b8vvmgglvgln8r0000gn/T/tkg-20200609T204435049272880.log
Creating workload cluster 'ks81'...

Validating configuration...
Waiting for cluster nodes to be available...

Workload cluster 'ks81' created
- Only two plans are available
devandprod. You can choose one of those. Also you can specify the number of workers you want to begin with, in the above command I went with3worker nodes
Troubleshooting
- If the workload cluster build fails, check the logs for the
capv-controller-manager
> kubectl logs capv-controller-manager-97fc4fbbf-hx98w -n capv-system -c manager
Digest the logs and you will find some good pointers.
Enjoy!