vSphere 7 + Workload Management
To enable Workload Management on vSphere 7, ensure the following steps are completed:
- Create a VDS
TEP, without any port groups, and attach the desired hosts to it, allocate thevmnic1 - Setup NSX-T Management, Edge and prepare the TEP on the VDS
- Create a Tag on the storage/s that will be used for workload management
- Click in vCenter > Storage
- Select the storage and click on Actions > Tags & Custom Attributes > Assign Tag
- Create a tag with the name
k8sand Category name ask8sand select all - Assign the tag
- Next create a
VM Storage Policiesby clicking in vCenter >Policies and Profiles>VM Storage Policies- Click on
Create VM Storage Policy - Name:
k8s-storage - Enable tag based placement rules
- Tag Category:
k8sand Tagsk8s - Storage compatibility: should see all the storages
- Click on
- On the cluster, enable DRS and HA. Ensure the vmk0 is enabled for vMotion & vSAN
-
Deploy
T0-Router - Download and host the content library on linux box script
#!/bin/bash -x CONTENT_URL=https://wp-content.vmware.com/v2/latest/ CONTENT_FOLDER=/data/vmware/content mkdir ${CONTENT_FOLDER} wget ${CONTENT_URL}/items.json -O ${CONTENT_FOLDER}/items.json wget ${CONTENT_URL}/lib.json -O ${CONTENT_FOLDER}/lib.json FOLDERS=$(cat ${CONTENT_FOLDER}/items.json | jq -r '.items[] | .name') for f in ${FOLDERS}; do if [[ ! -d "${CONTENT_FOLDER}/${f}" ]]; then mkdir -p ${CONTENT_FOLDER}/${f} fi pushd ${CONTENT_FOLDER}/${f} if [[ ! -f "item.json" ]]; then wget ${CONTENT_URL}/$f/item.json -O item.json fi FILES=$(cat item.json | jq -r '.files[] | .name') for file in ${FILES}; do if [[ ! -f "${file}" ]]; then wget ${CONTENT_URL}/$f/$file -O $file fi done popd done - Install nginx on
ubuntu.lab.intand set the port to listen on 9090, update the /etc/nginx/sites-available/defaultserver { listen 9090 default_server; listen [::]:9090 default_server; root /data; index index.html index.htm index.nginx-debian.html; server_name _; location / { autoindex on; try_files $uri $uri/ =404; } } - Setup content Library by clicking on vCenter > Menu > Content Libraries
- Create one with the name
k8sand Subscribed content library:http://ubuntu.lab.int:9090/vmware/content/lib.json
- Create one with the name
- If all the above is done, then click on vCenter > Menu > Workload Management
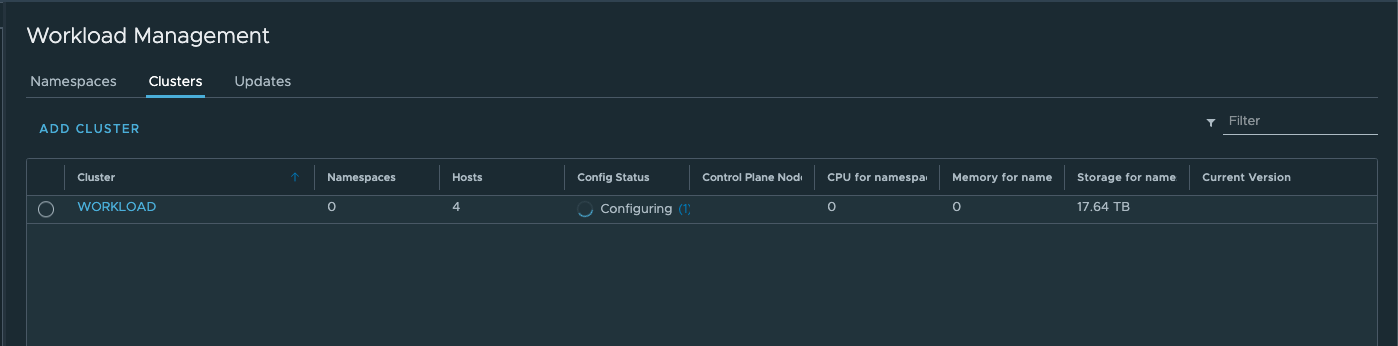
- Click Enable, and you should see the clusters in the compatible list
- Cluster:
WORKLOAD - Size:
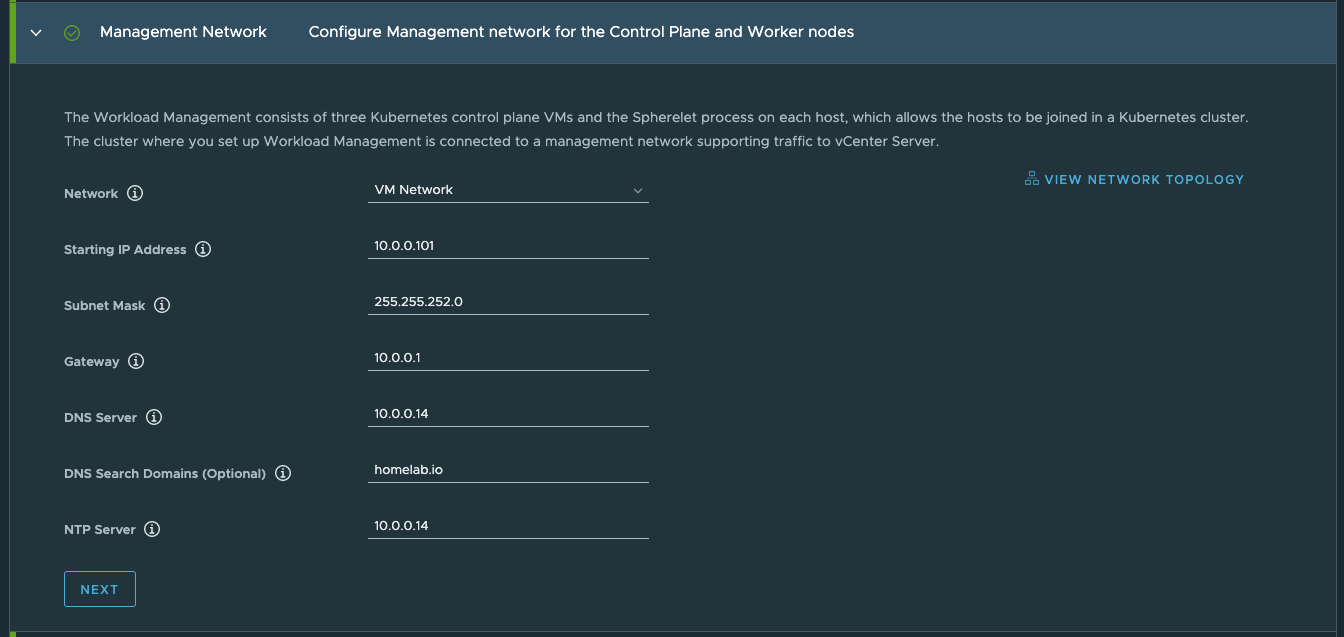
Tiny - Management
Network- Network:
VM Network - Start IP Address:
10.0.0.101 - Subnet Mask:
255.255.252.0 - Gateway:
10.0.0.1 - DNS Server:
10.0.0.14 - NTP Server:
10.0.0.12 - DNS Search Domain:
lab.int
- Network:
- Workload Network
- vSphere Distributed Switch:
TEP - Edge Cluster:
edge-cluster - API Server endpoint FQDN:
supervisor.lab.int - DNS Server:
10.0.0.14 - Pod CIDRs:
10.244.0.0/21 - Service CIDRs:
10.96.0.0/24 - Ingress CIRDs:
10.0.0.128/27 - Egress CIDRs:
10.0.0.192/27
- vSphere Distributed Switch:
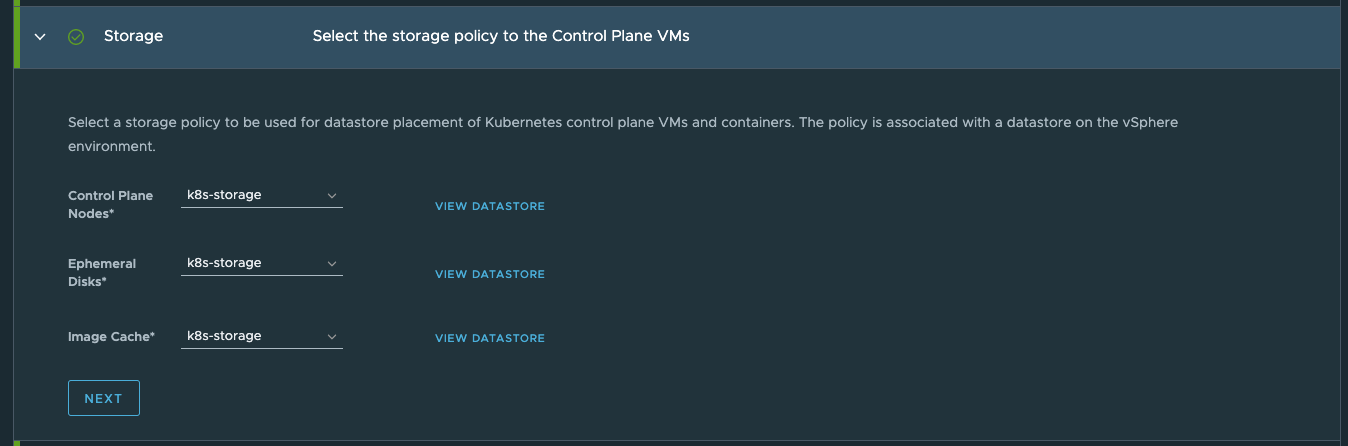
- Storage:
- Control Plane Node:
k8s-storage - Ephemeral Disks:
k8s-storage - Image Cache:
k8s-storage
- Control Plane Node:
- Review and apply


- Cluster:
- Click Enable, and you should see the clusters in the compatible list
- To view the logs of the ongoing activities:
ssh root@vcenter.lab.int
shell
tail -f /var/log/vmware/wcp/wcpsvc.logtail -f /var/log/vmware/> wcp/wcpsvc.log
-
Click on the Cluster
WORKLOAD> Configure > Namespaces > Image Registry > Enable Harbor, and select thek8s-storage. This will provision a harbor instance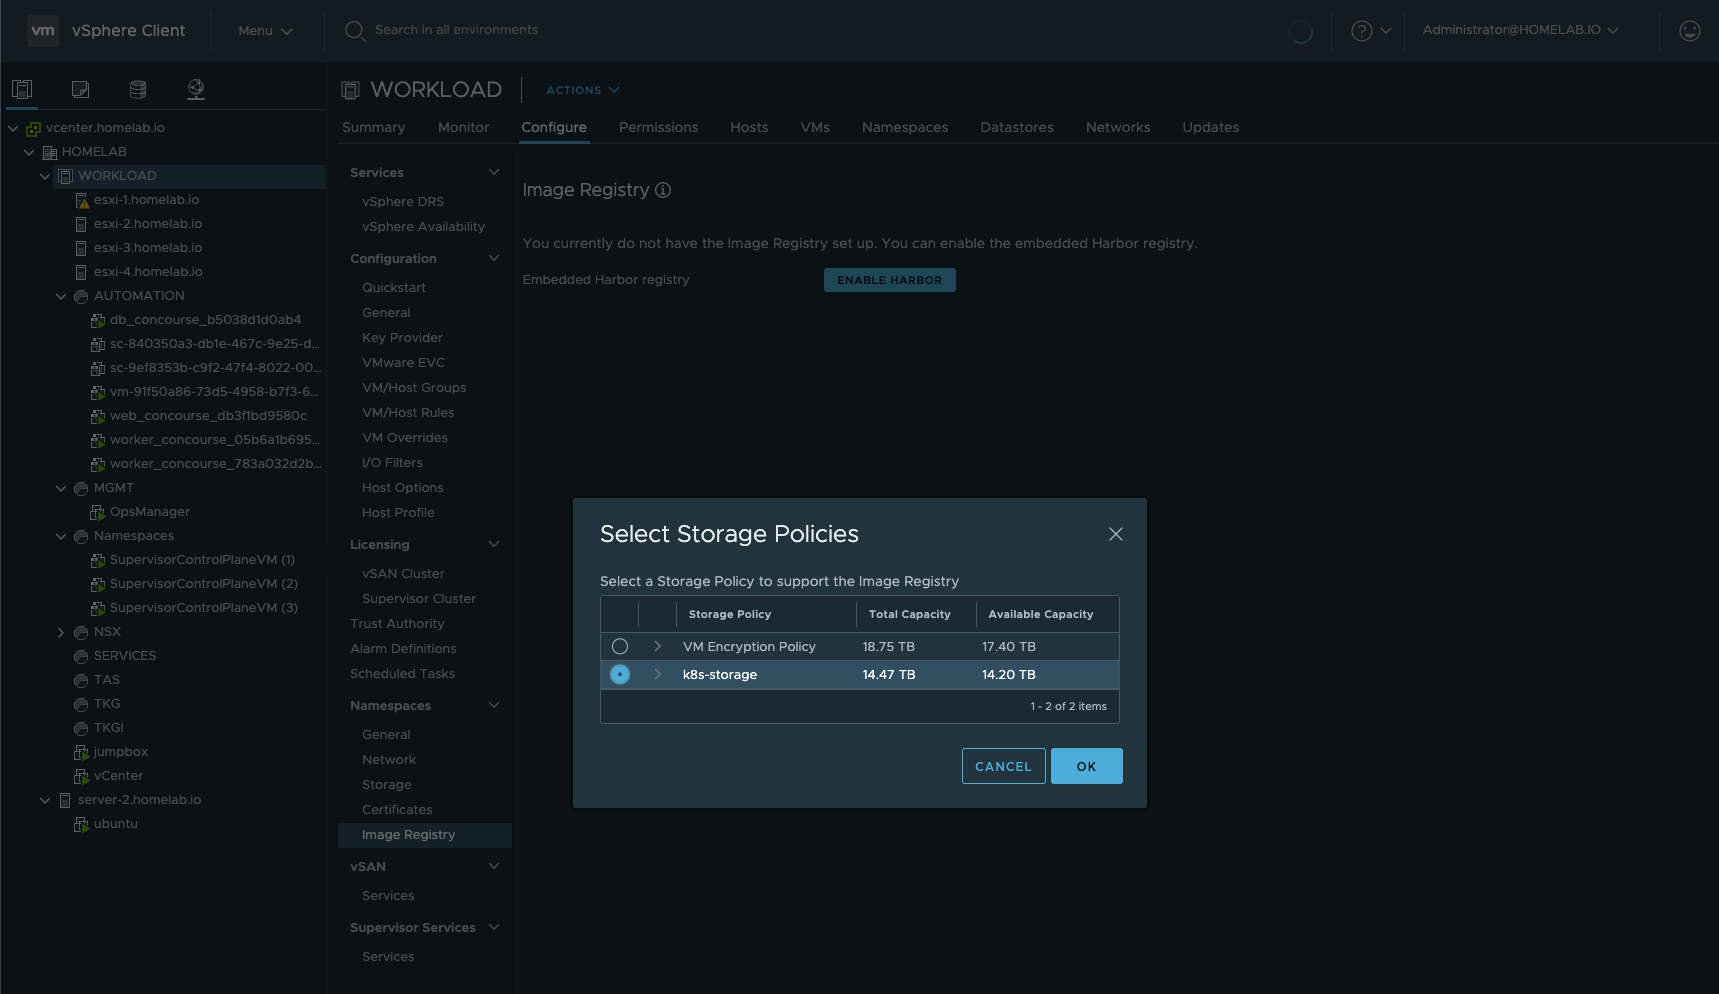
-
Click on the Cluster
WORKLOAD> Configure > Namespaces > General > Add Library >k8s-storage -
Create a namespace
k8s1using the Workload Management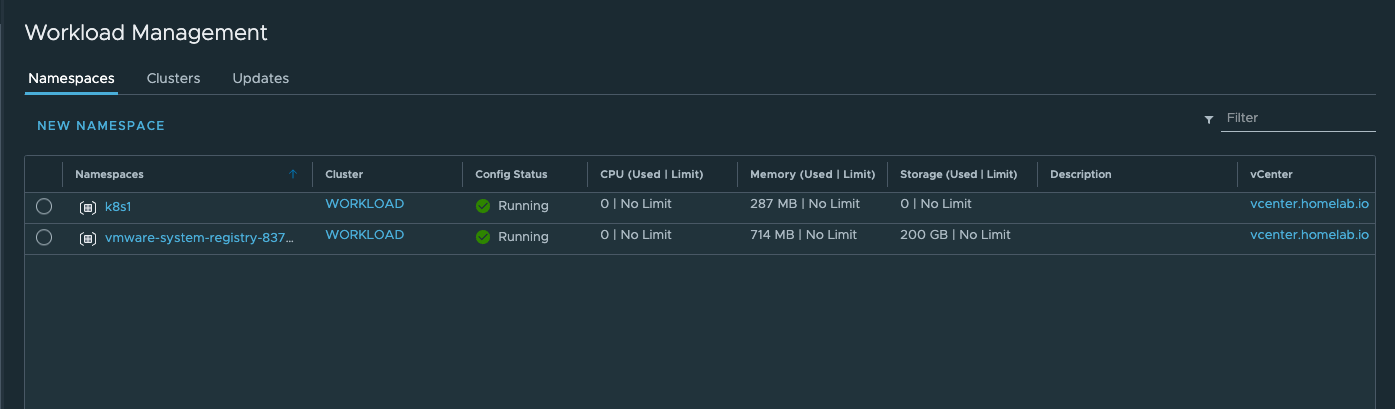
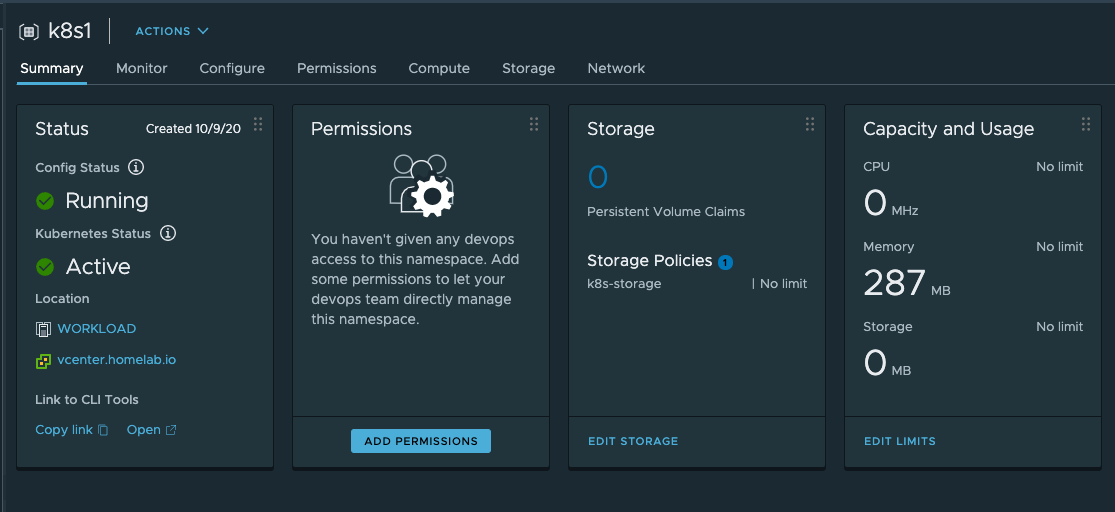
-
Download the kubectl vsphere plugin, by connecting to the supervisor cluster. Click on the
k8s1and on summary > status, click onOpenlink to CLI tools. Download the cli and put it in the path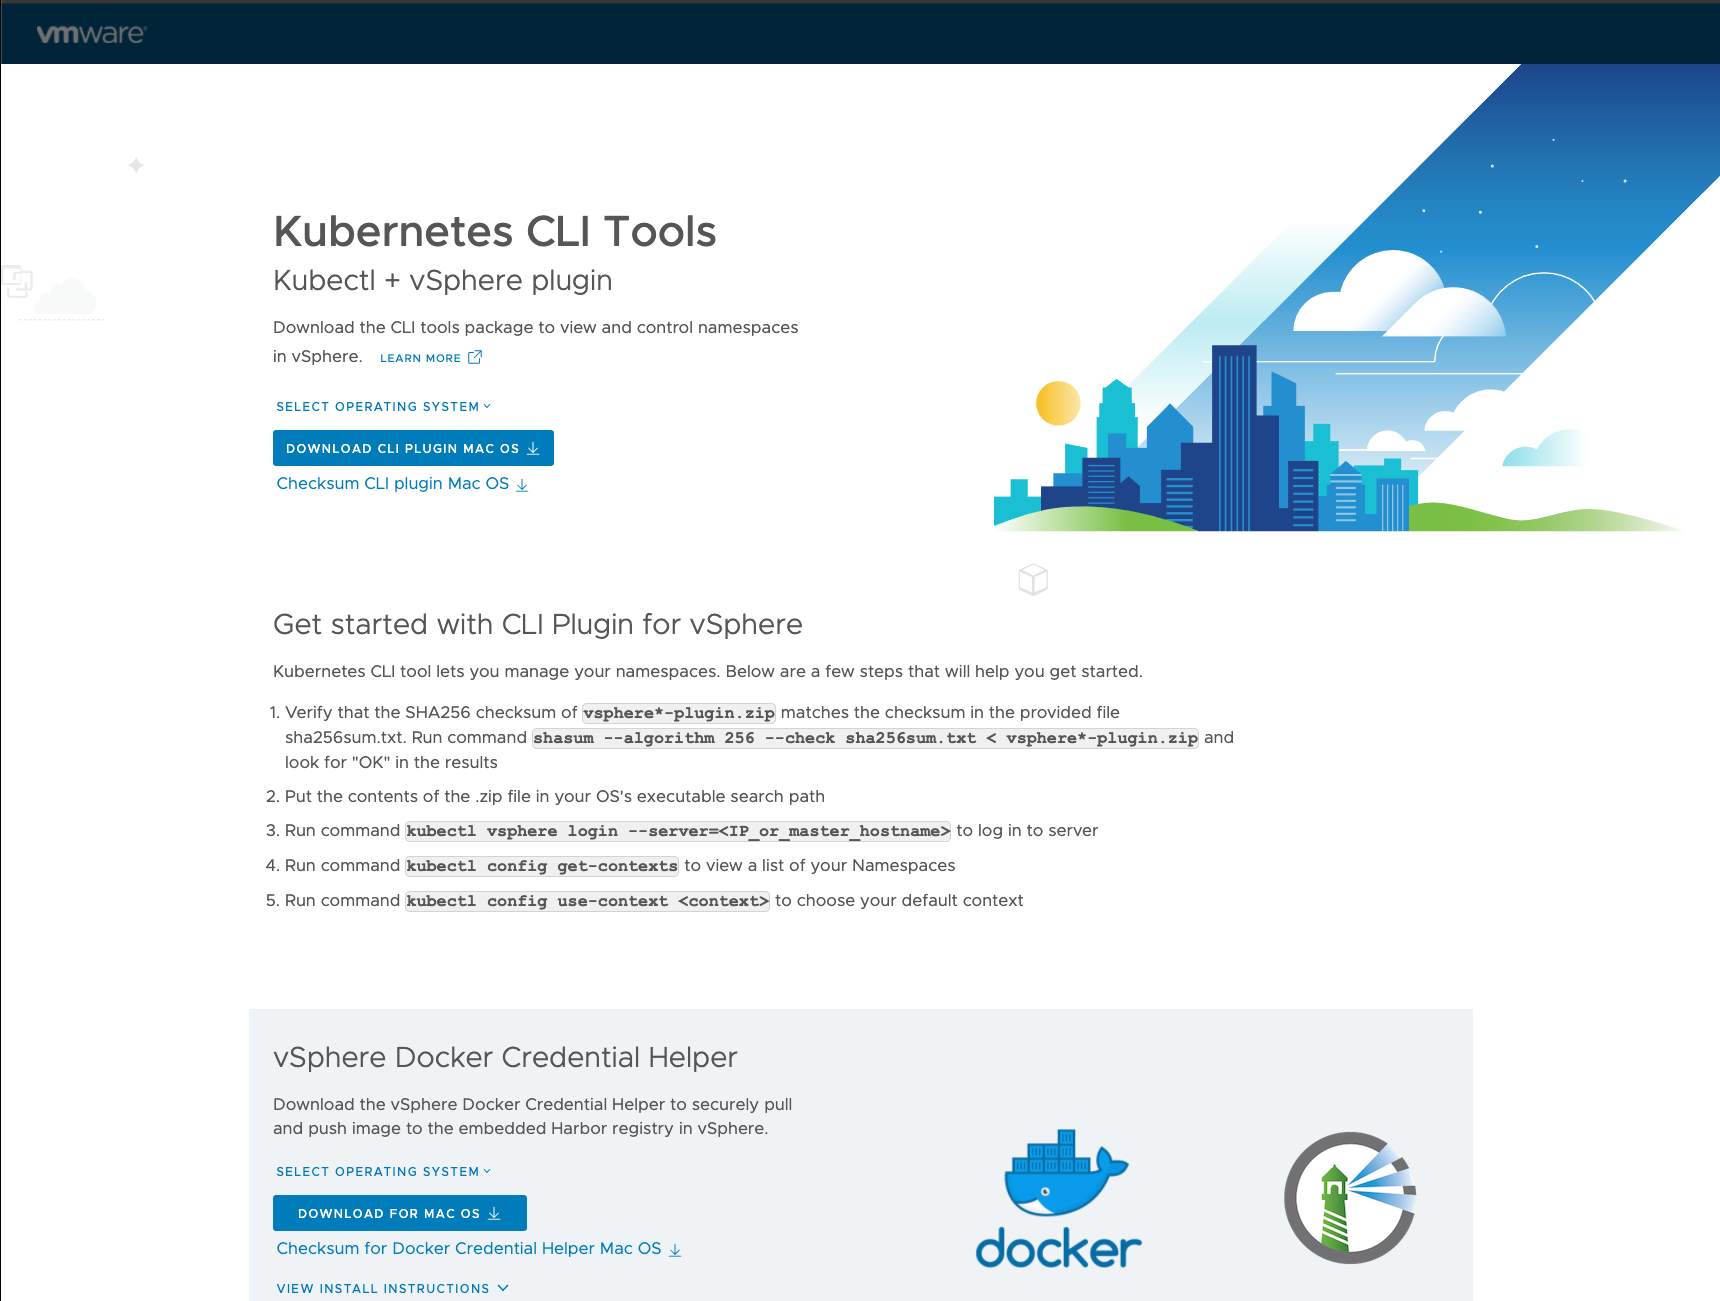
-
Next connect to the supervisor cluster
k vsphere login --server=https://10.0.0.129/ --insecure-skip-tls-verify --vsphere-username=administrator@lab.intand login as administratork config use-context k8s1 - List all the k8s versions available
k get virtualmachineimages

NAME                                                         VERSION                           OSTYPE
ob-15957779-photon-3-k8s-v1.16.8---vmware.1-tkg.3.60d2ffd    v1.16.8+vmware.1-tkg.3.60d2ffd    vmwarePhoton64Guest
ob-16466772-photon-3-k8s-v1.17.7---vmware.1-tkg.1.154236c    v1.17.7+vmware.1-tkg.1.154236c    vmwarePhoton64Guest
ob-16545581-photon-3-k8s-v1.16.12---vmware.1-tkg.1.da7afe7   v1.16.12+vmware.1-tkg.1.da7afe7   vmwarePhoton64Guest
ob-16551547-photon-3-k8s-v1.17.8---vmware.1-tkg.1.5417466    v1.17.8+vmware.1-tkg.1.5417466    vmwarePhoton64Guest
ob-16897056-photon-3-k8s-v1.16.14---vmware.1-tkg.1.ada4837   v1.16.14+vmware.1-tkg.1.ada4837   vmwarePhoton64Guest
ob-16924026-photon-3-k8s-v1.18.5---vmware.1-tkg.1.c40d30d    v1.18.5+vmware.1-tkg.1.c40d30d    vmwarePhoton64Guest
ob-16924027-photon-3-k8s-v1.17.11---vmware.1-tkg.1.15f1e18   v1.17.11+vmware.1-tkg.1.15f1e18   vmwarePhoton64Guest
- Create a cluster yaml and then run
k create -f cluster.yamlapiVersion: run.tanzu.vmware.com/v1alpha1 kind: TanzuKubernetesCluster metadata: name: k8s1-cluster namespace: k8s1 spec: topology: controlPlane: count: 3 class: best-effort-xsmall storageClass: k8s-storage workers: count: 3 class: best-effort-xsmall storageClass: k8s-storage distribution: version: v1.17.8 settings: network: cni: name: calico services: cidrBlocks: ["198.51.100.0/12"] pods: cidrBlocks: ["192.0.2.0/16"]~/D/g/r/tkg ❯❯❯ k apply -f cluster.yaml tanzukubernetescluster.run.tanzu.vmware.com/k8s1-cluster createdThis will take a while, and you can watch the cluster creation by
k get TanzuKubernetesCluster -w - After the cluster creation is complete, you should see
k get TanzuKubernetesCluster NAME CONTROL PLANE WORKER DISTRIBUTION AGE PHASE k8s1-cluster 3 3 v1.17.8+vmware.1-tkg.1.5417466 9m24s running - Finally
k vsphere login --server=https://10.0.0.129/ --insecure-skip-tls-verify --vsphere-username=administrator@lab.int --tanzu-kubernetes-cluster-namespace=k8s1 --tanzu-kubernetes-cluster-name=k8s1-cluster