TKG on vSphere 7
Love VMware and Tanzu Kubernetes Grid (TKG)? Have vSphere 7, and want to use TKG that’s not integrated with vSphere?
Then you are at the right spot!
-
Begin with downloading the TKG cli from VMware Downloads, and look for Tanzu Kuberenets Grid
-
The official documantation is here
-
Once downloaded, untar the contents into a folder, and add it into your
PATH -
Download the Kubernetes OVA/s, import the OVA/s, and convert them into templates
-
Next run the
tkg init --ui, which will open your browser pointing tohttp://127.0.0.1:8080/#/ui
-
Follow the steps to configure the vSphere IaaS
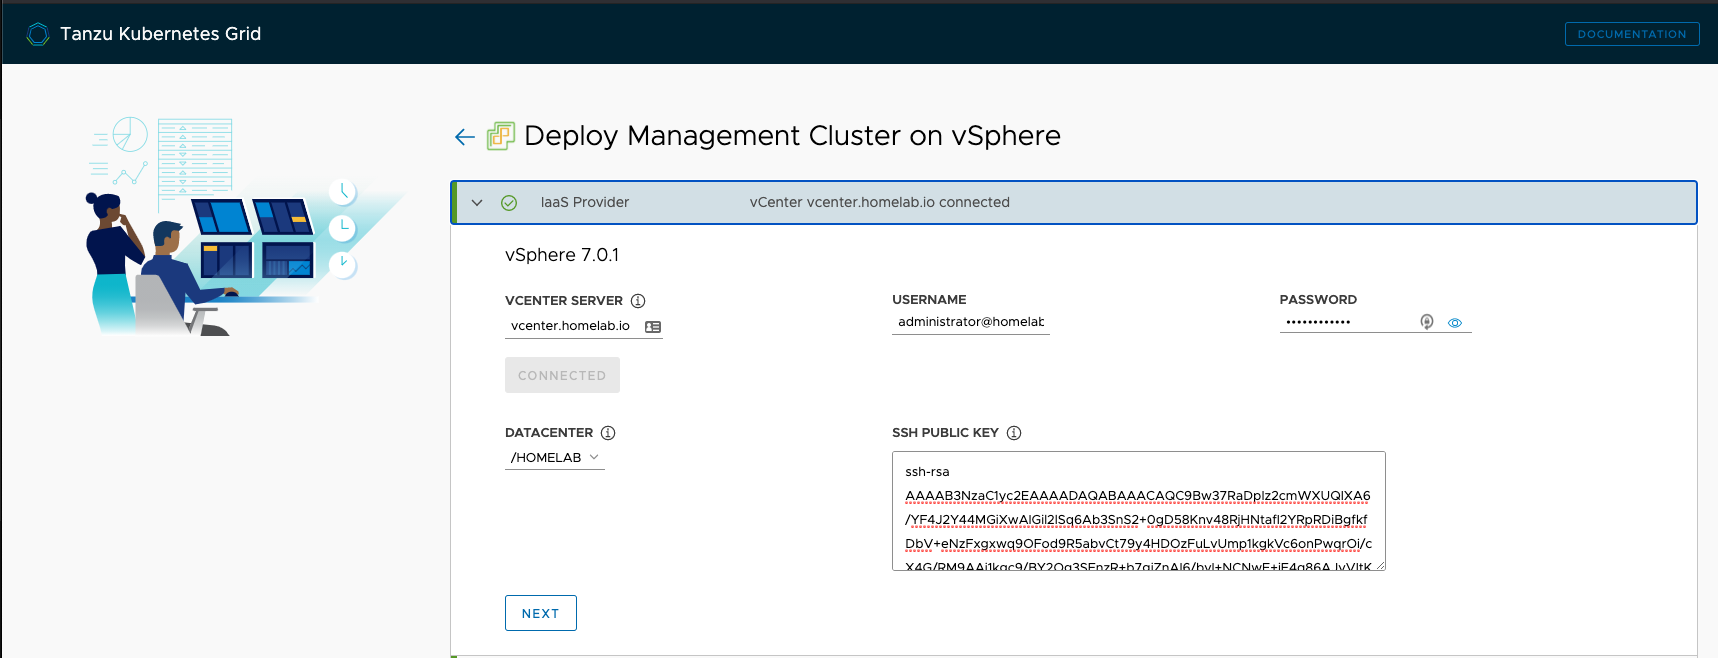
-
You would be presented with 2 options, to either use vSphere with Tanzu, or to use the non-integrated version, so proceed with the second option

-
Generate a ssh key:
ssh-keygen -b 4096. And copy the contents of the public key into the UI - Select the Instance Type from
DevelopmentorProduction. For ex:- Management Cluster Name:
mc-cluster - Virtual IP Address:
10.0.1.1<– This is an IP that belongs to the subnet that has DHCP enabled, but in the reserved range - Machine Health Checks:
Enable - Worker Node Instance Type:
medium

- Management Cluster Name:
-
Optionally specify any Metadata

-
Configure the Resources

-
Select the network that has DHCP enabled
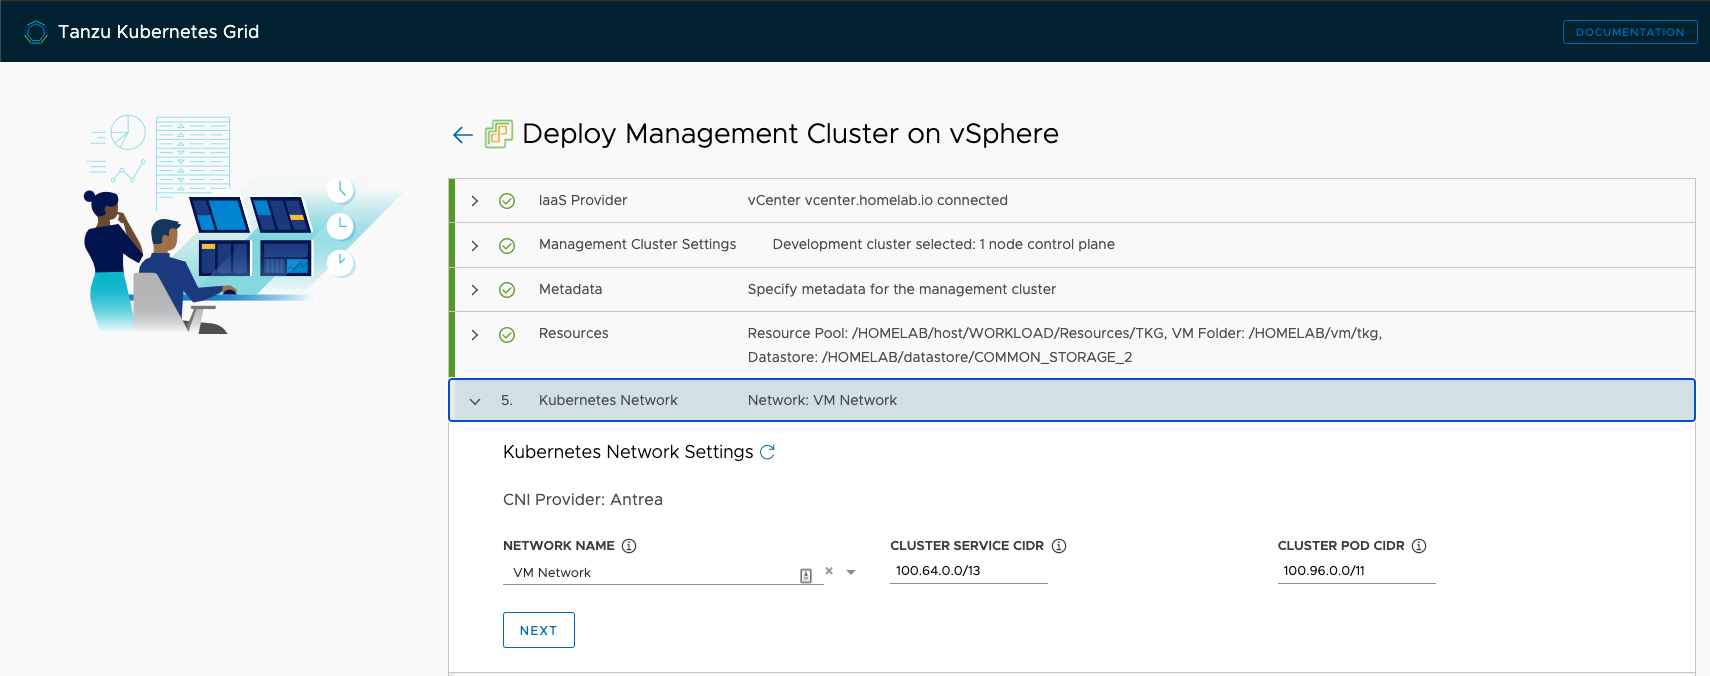
-
Select the OS Image, its the template that you imported earlier

-
CEIP Agreement

-
Next Review the configuration, and edit the configuration if you find anything wrong
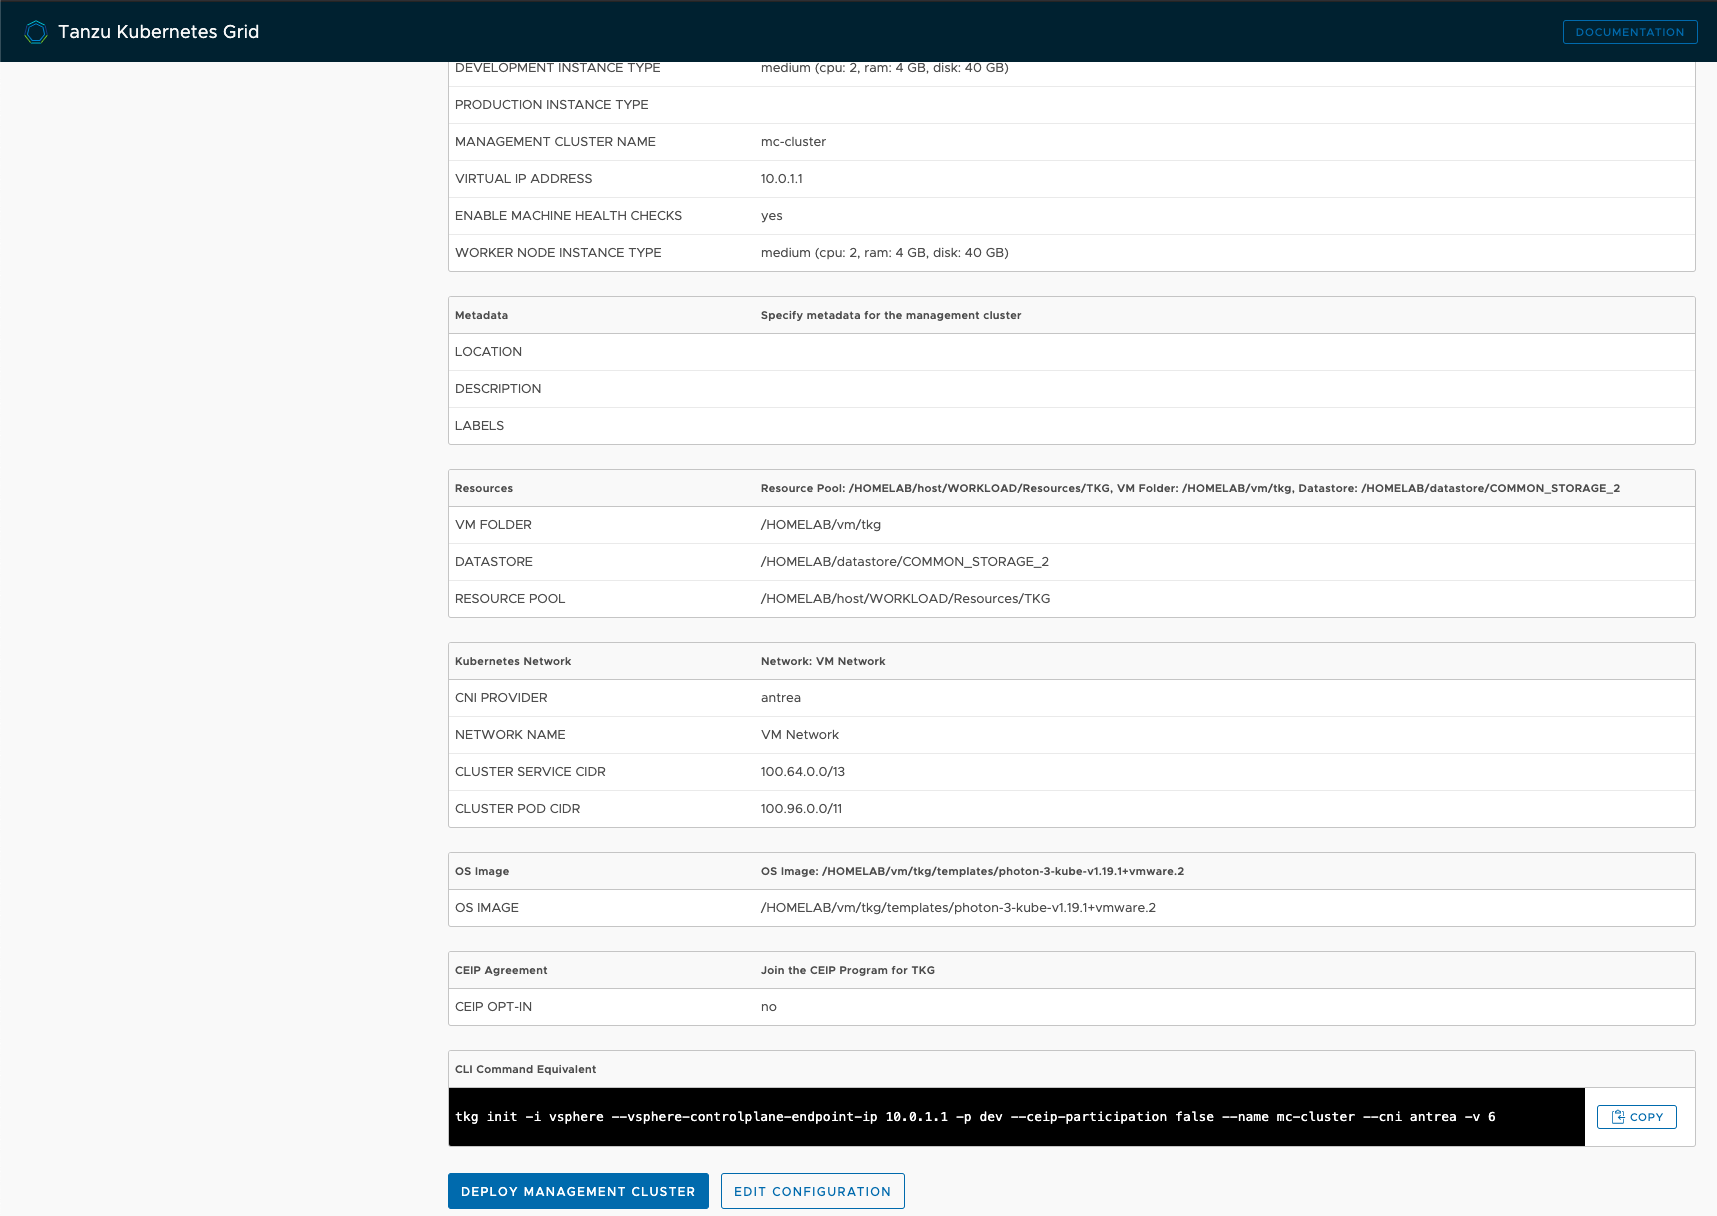
-
I prefer using the CLI to create the Management Cluster:
tkg init -i vsphere \ --vsphere-controlplane-endpoint-ip 10.0.1.1 \ -p dev \ --ceip-participation false \ --name tkg-mc \ --cni antrea \ -v 6 -
Wait till you see the output as below:
Set Cluster.Spec.Paused Paused=false Cluster="tkg-mc" Namespace="tkg-system"
Context set for management cluster tkg-mc as 'tkg-mc-admin@tkg-mc'.
Deleting kind cluster: tkg-kind-bu4spgevvhfketokpcjg

Management cluster created!


You can now create your first workload cluster by running the following:

  tkg create cluster [name] --kubernetes-version=[version] --plan=[plan]
Note: If the cluster deployment fails, it could be possible that the DNS settings are wrong, or DHCP is not enabled. Also it could be that the vcenter host is not resolving, so you might want to use the IP instead.
- If all goes well, then you can create your very first workload cluster:
tkg create cluster k8s1 -p dev \
-c 3 \
-w 5 \
--vsphere-controlplane-endpoint-ip=10.0.1.2
Note: You are providing the static IP here for the kubernetes VIP that’s configured on the control plane, to handle all the API calls
-
If the deployed succeeds, you will the logs as below:
tkg create cluster k8s1 -p dev -c 3 -w 5 --vsphere-controlplane-endpoint-ip=10.0.1.2 Logs of the command execution can also be found at: /var/folders/mf/qzb9wk1d7rddzcq9csjr0p5c0000gn/T/tkg-20201016T115051636576781.log Validating configuration... Creating workload cluster 'k8s1'... Waiting for cluster to be initialized... Waiting for cluster nodes to be available... Waiting for addons installation... Workload cluster 'k8s1' created -
Next step is to get the cluster credentials:
tkg get credentials k8s1 - And that’s basically it. You can now run your
kubectlcommands and explore the cluster.
Cheers!